
I remember being fascinated with Baked Alaska as a child. Mum did not make it very often, but when she did, I was amazed at how Mum could cook an ice-cream cake. These days I understand that that meringue insulates the cake, but as a child I though she was some kind of cooking magician.
Despite having Baked Alaska as a child, I had never made it for my own family until last year. Therefore, it was a food I chose for our food challenge to try 12 new foods over 12 days. Everyone voted it as the best new food, so of course it had to be made again!

Even though Baked Alaska looks complicated it can be a fairly simple dessert. (It can become more complicated if you want to have many layers!)
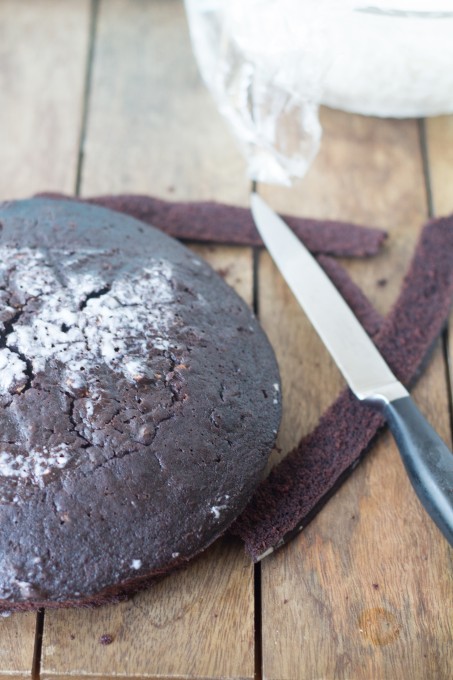
The first step is to bake a cake. You can either use one of your own favorite recipes or use a packet mix. I used a Gluten Free packet mix for the Baked Alaska in this picture. The cake will need to cool completely before you use it
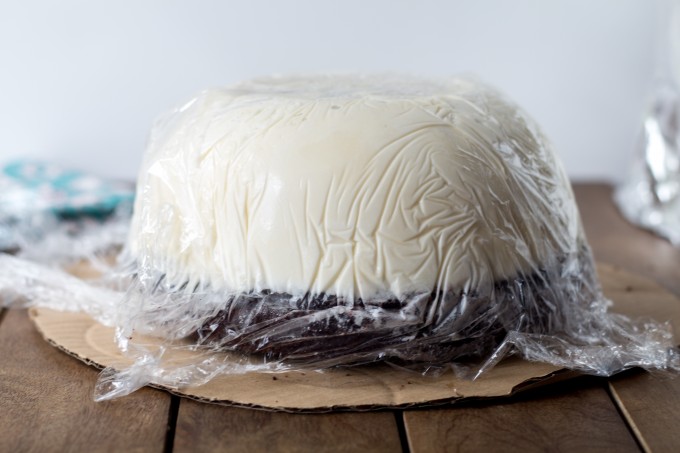
The next step is to line a large bowl with plastic wrap. The diameter of your bowl needs to be similar to the diameter of your cake pan, as you will be placing the cake inside the bowl. My hint here – it’s better to make the cake slightly larger than slightly too small. The cake can be trimmed easily but it’s hard to trim down the ice-cream to fit the cake.
Next you need to choose your ice-cream. I used vanilla, but you can use any to fit your tastes. If I hadn’t been sharing with a gluten free eater, I think I would have used Cookies and Cream Ice-cream. It’s a favorite of mine!
Soften your ice-cream by leaving it on the bench for 5-10 minutes. Then, either mix it by hand or use a paddle fitting on a standing mixer. Fill the plastic lined bowl with the softened ice-cream and use a spatula to flatten the top of the ice-cream. Put the ice-cream back in the freezer until it is firm again – at least 4 hours.

The next step is to place the cake on top of the ice-cream. You may need to trim your cake, as it needs to make full contact with the ice-cream.
Cover the bowl with plastic wrap, and place back in the freezer until you are ready to serve. My preference is to move straight onto the next step here, as I don’t like my cake to freeze. However, life happens, and most times it is necessary. I’d rather be spending time with my family or friends, than in the kitchen doing the preparation!
When it’s time to serve, take the cake out the freezer. Cut a base for the cake out of hard, clean cardboard. It needs to be about 1 inch larger than your bowl. You may also use a purchased cake board. Tip the cake onto the cardboard. Put the cake back into the freezer until you have finished making the meringue.
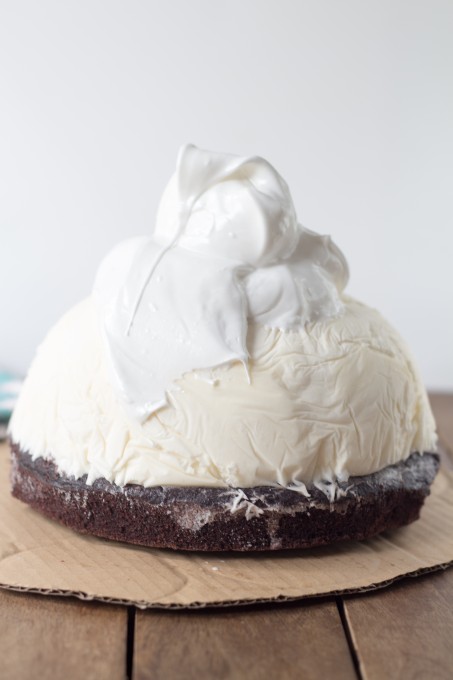
Unfortunately, the meringue cannot be made in advance. If you try to make it ahead of time, it will loose volume and become watery. Once you have your meringue, bring the cake out of the freezer. Cover it with the meringue, making sure that you bring the meringue all the way down to the cardboard. The meringue acts as an insulator, preventing the ice-cream from melting during the cooking process.
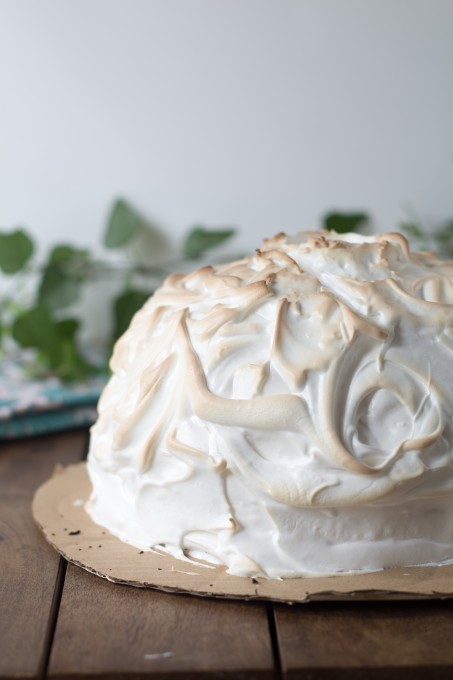
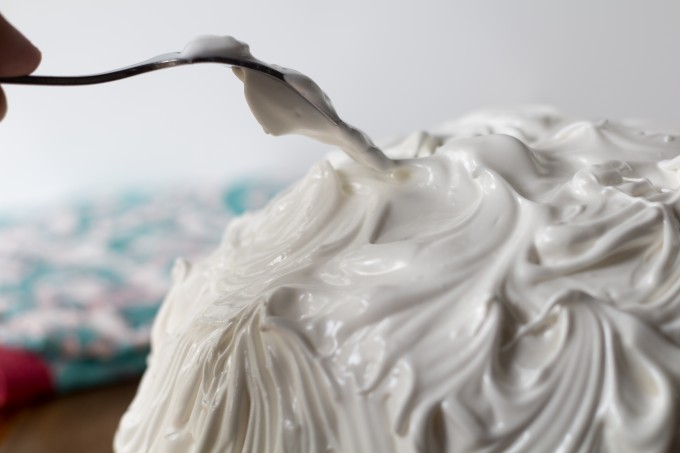
Baked Alaska is often decorated in a swirling pattern. To achieve this you need a spoon and a fork. Use the back of the spoon to create swirls on the meringue.

Next, take your fork and gently lift the meringue to make peaks.
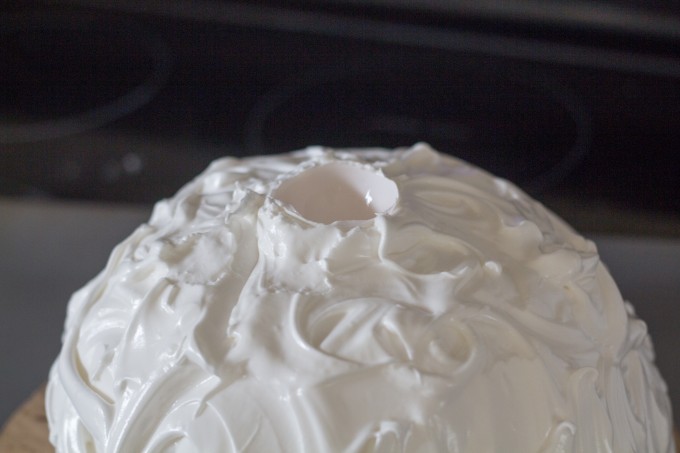
If you wish to set your Baked Alaska on fire, you will need to place a clean egg shell in the top of the meringue.
Cook the Baked Alaska in a very hot oven for about 3-5 minutes. Keep on close eye on the Baked Alaska and remove it when the peaks are starting to turn golden. Don’t open the door during cooking though, as this will effect the meringue.
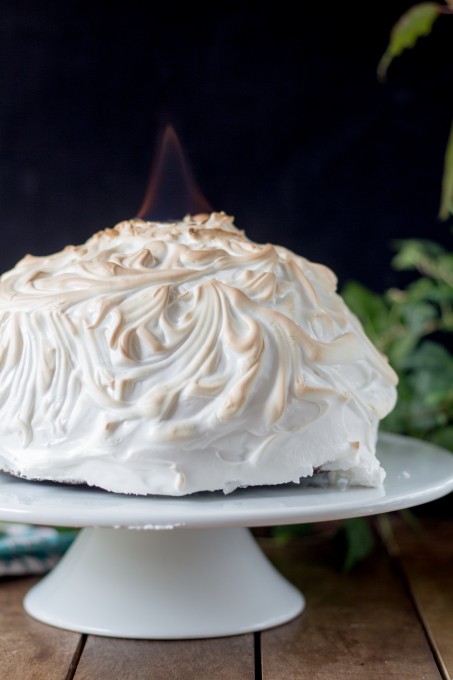
The Baked Alaska is ready to serve as soon as it comes out of the oven. If you are setting your cake on fire, now is the time!
When we made this cake last year, my love volunteered to test which alcohol gave the best flame. We went through about 9 different types of alcohol. I was also told to use brandy, but we found that the brandy did not give off much flame. From the alcohol we had in our house, our 100% Proof Peppermint Schnapps gave the best flame. He drank each sample after setting it alight, so by the end I had one very happy and chatty husband.
Cut the Baked Alaska using a hot, dry knife. Freeze any leftovers.

- 1 chocolate cake recipe or packet chocolate cake mix
- 1 1/2 quarts vanilla ice-cream
- 4 large egg whites, at room temperature
- 1/8 teaspoon salt
- 1 cup superfine sugar
- 1 teaspoon vanilla extract
- Bake the chocolate cake according to recipe or packet directions. Allow to cool completely.
- Line a large bowl with plastic wrap. You may need to use 2 pieces.
- Let the vanilla ice-cream soften on the bench for 5 minutes. Scoop the ice cream into another large bowl and then beat the ice-cream until it is spreadable. Transfer the ice-cream into the plastic lined bowl and use a spatula to spread the ice-cream evenly. Return to the freezer until ice-cream is firm again, at least 4 hours.
- If necessary, trim the chocolate cake in order to fit the cake on top of the ice-cream.
- Cut a circle out of a piece of heavy, clean cardboard, approximately 1 inch larger than your bowl.
- Place the chocolate cake on top of the ice-cream, in the bowl. If serving later, cover the chocolate cake with plastic wrap and return to the freezer.
- Tip the chocolate cake and ice-cream onto the cardboard, and remove the bowl. Leave the plastic wrap on, and return to the freezer until needed.
- Preheat the oven to 500° F.
- In a stand mixer, fitted with the whisk attachment, place the egg whites into the bowl and beat until they form soft peaks - about 2 minutes. Wash and keep one half of an egg shell.
- Keep beating the egg whites and slowly add the superfine sugar, beating well with each addition. It should take about 2-3 minutes to add the sugar. Add the vanilla extract and continue to beat the egg whites until the mixture is thick and glossy, forming firm, stiff peaks. This will take about 2 minutes.
- Remove the cake from the freezer, and place the cake (including the cardboard) onto a baking tray. Remove the plastic wrap.
- Spread the outside of the cake with the meringue, making sure that you cover the cake completely, right down to the cardboard base. Use a spoon to create swirls in the meringue and a fork to create decorate spikes. Place the washed egg shell in the top of the meringue, if wanting to set Baked Alaska on fire when serving.
- Bake the cake until the peaks of the meringue are browned. This will take about 2-5 minutes. Do not open the door of the oven during this time.
- Transfer the cake to a serving platter. Fill the egg shell with alcohol, and set alight immediately prior to serving.
- Slice using a large serrated knife, dipped in hot water.
- Refreeze any leftovers, covered in plastic wrap.

Great recipe !! Easy to follow, I will defiantly try this myself. I love Baked Alaska and have a few recipes at
http://ilovebakedalaska.com/